

How to make the easiest Lego table ever!
If you travel by car as often as we do, eventually the fun of travel books and games will start to wear off for your kids. That’s when you have to dig deep and get creative to keep the peace in the backseat! I’ve got the ultimate road trip activity hack and it will take you less than five minutes to make. Read ahead to find out how to make a Lego table for the car.
Some links may be affiliate links. By clicking on them and making a purchase I may make a small commission at NO extra cost to you. Thank you for your support!
Entertainment in the Car
As I said above, once you hit a certain amount of road trip hours, the activity books aren’t going to cut it for entertainment for your kids anymore. (See my other road trip and travel entertainment ideas here.) When my kids were toddlers I used to bring a gallon sized zipper back full of Duplos. They could build on their travel tray and the pieces were big enough to easily be found when they were dropped.
Once the kids got older and started using regular sized Lego bricks
a) I didn’t want an entire gallon bag full of tiny bricks in the car and
b) they would NOT be easy to clean up if they were dropped. I came up with a new solution!
Materials for a Lego table
Here are the handful of items you’ll need to build your own Lego table for traveling.
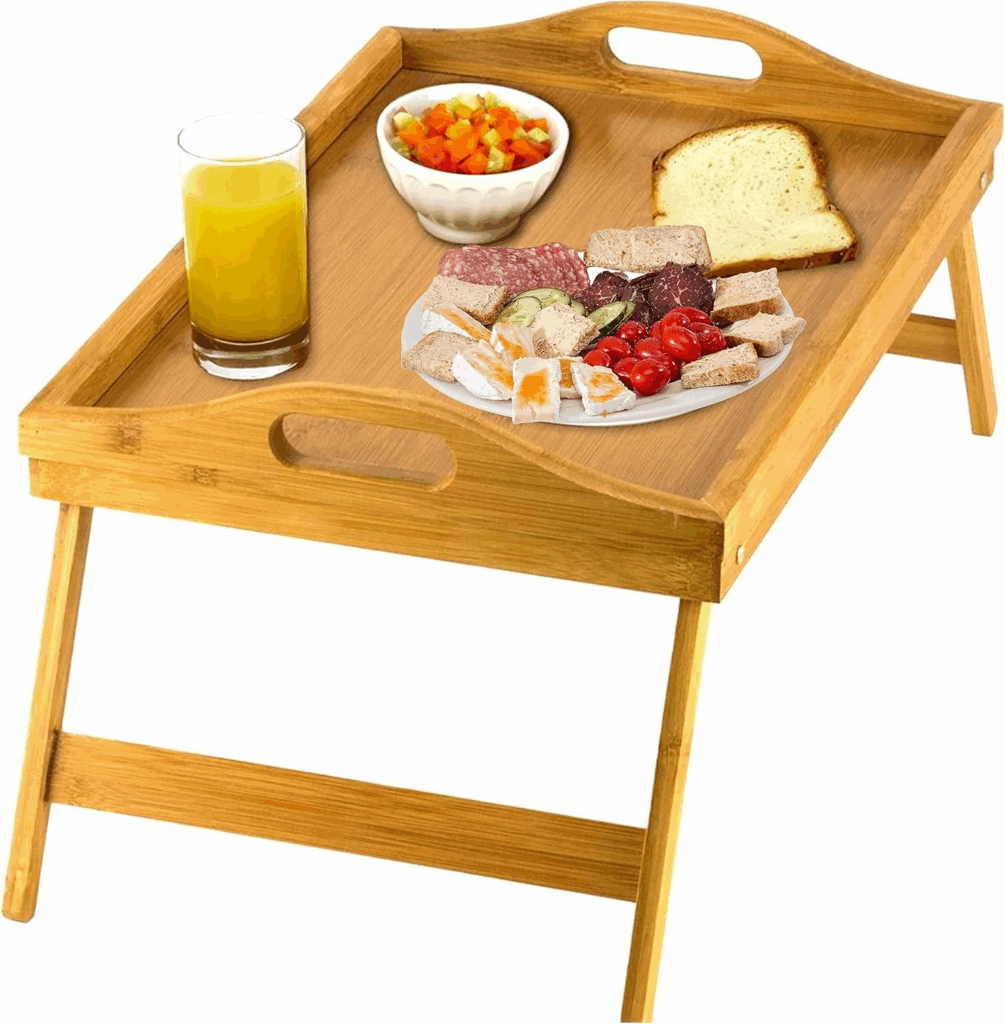
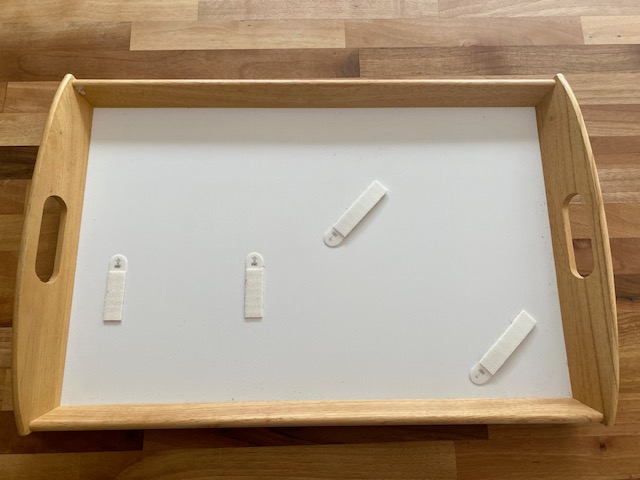
- A bed tray table. I think I got ours from Ikea a million years ago and they no longer carry the same version. The key is to have a border around the edge so Lego bricks don’t go sliding off of the table. This one from Amazon looks like it would work well and it has folding legs for easy storage!
2) A roll or pieces of self sticking Velcro (two feet should be plenty, or you can use several of the individual squares.), or 3M Command strips.
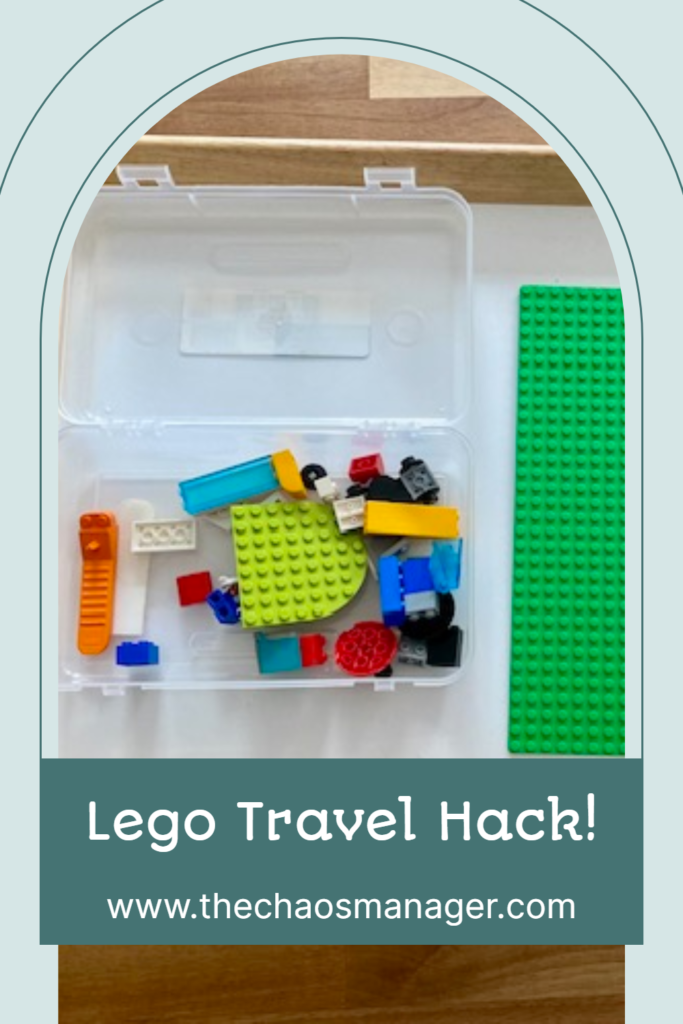
3) A plastic pencil box. The kind from the dollar store would be perfect. If you can’t find one there, here’s a link from Amazon for a $6.00 version.
4) Rubbing alcohol

How to assemble a Lego table for traveling!
Step 1) Using the rubbing alcohol, wipe down the top of the tray table and the bottoms of the Lego plate and pencil box.
Step 2) Cut your Velcro to size if necessary. If you are using the roll of Velcro, you will need to cut it to the correct length. You will want at least two strips on the pencil box. For the base plate you can choose to attach Velcro to the corners, make two rows or just attach to all four sides. I used the 3M Velcro Command Strips in case I ever wanted to use the items for something different in the future (spoiler alert: this tray is at least 7 years old now and yet to be repurposed).
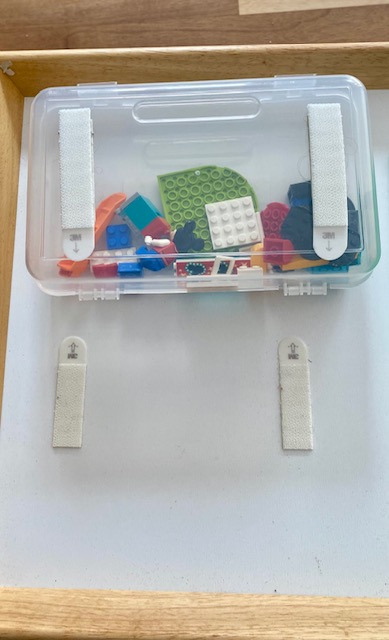
Step 3) Stick the Velcro to the pencil box and Lego base plate. Keeping both the hook (rough side) and loop (soft side) of Velcro together, stick the hook part of the Velcro to the two items. Push the Velcro down for at least 10 seconds to help it bond.
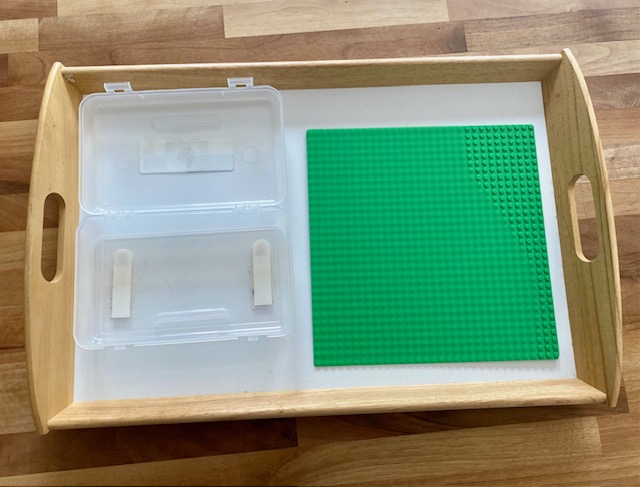
Step 4) Attach items to the tray table. Make sure to map out where you would like the items to go before sticking them on. Stick the remaining half of the Velcro (loop side) to the tray table. Although you can always change it, it is helpful to have the pencil box open towards the base plate. Open the pencil box and press on the bottom half for at least 10 seconds to help it stick to the table. Repeat with the Lego base plate.
How to use the travel Lego table
When you’re ready to use your Lego table, fill the pencil box with the Lego you would like to bring on your trip. We always try to bring one or two minifigures and then a wide variety of bricks, keeping away from specialty items you may not use as often. Be sure the pencil box is closed tightly!
Enjoy playing with Lego in the car without worrying about the bricks falling all over the place. If you’d like, you can easily remove the base plate and pencil box to take into your destination with you.
When we travel to Disney World, we usually stop at the Lego store in Disney Springs on one of our first nights in town. Buying new Lego from the Pick-A-Brick wall is a fun way to purchase a souvenir that doubles as entertainment during the trip and for the car ride home!
Looking for even more travel ideas? Check out some of my latest posts:


3 Comments
Pingback:
Pingback:
Pingback: